Netsight User Guide
Before You Start Netsight
1) Java JRE 1.4 required
Netsight requires Java JRE 1.4 or
greater in order to run. Make sure that the java.exe
file of JRE 1.4 or greater is included in your system path.
2) Java Virtual Machine (VM) memory requirements
If you are loading large graphs in Netsight, you need to allocate sufficient memory to the Java VM. You do this by appending the flags –Xms512m and –Xmx512m to the ‘java’ command. This allocates 512 Mb of memory to the Java VM. Netsight has been tested with no problems with this amount of memory.
For more information, refer to this web site:
http://java.sun.com/j2se/1.4.2/docs/tooldocs/windows/java.html#Xms
Starting Netsight
- Unzip
the Netsight.zip file.
- Execute
the netsight.bat file by typing
it in a command line or double-clicking the file name.
File Menu
1) Open a file
a. Click
File à
Open.
b. Select
a Pajek or GraphML file.
c. Click
Open.
Errors and Warnings:
a. Invalid
file extension – Error message displayed.
b. File
not found – Error message displayed.
2) Save a file
a. Click
File à
Save.
b. Type
a file name into the File Name text field.
c. Click
Save.
3) Open a default file
a. Click
File à
Open filename.
4) Exit Netsight
a. Click
File à
Exit.
OR
b. Click
the Close icon in the Netsight window.
Graph Menu
1) Display a graph
a. Open a graph.
b. Click
Graph à
Show Graph.
2) Re-draw a graph
a. Display a graph.
b. Click
Graph à
Redraw.
3) Draw graphs while traversing graph history
a. Click
the “Visualize When Traversing Graph History” check box.
Fitlers Menu
1) Create a subgraph
a. Click Filters à Apply Filters. The Filters List dialog window will be displayed.
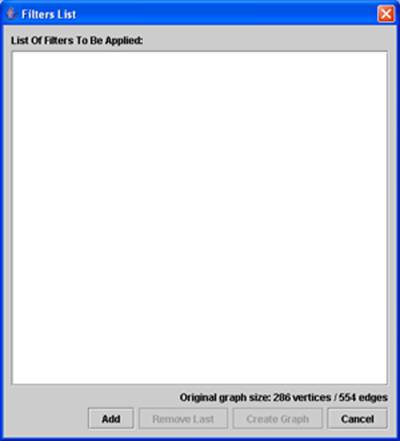
b. Click Add. The Create Filter dialog window will be displayed.

c. To add a filter to the filters list:
Adding the K-Neighborhood Filter:
i. Select KNeighborhood Filter from the list.
ii. Select at least one vertex from the Vertex Browser on the right.
iii. Select the k-distance away from the selected node(s) that you want your subgraph to contain using the distance spinner widget.
Adding the Degree Filter:
i. Select Degree Filter from the list.
ii. Select the lower bound number of incident edges that a vertex in your subgraph can have using the Min spinner widget.
iii. Select the upper bound number of incident edges that a vertex in your subgraph can have using Max spinner widget.
Note: The lower bound cannot be greater than the upper bound.
Adding the Vertex Set Filter:
i. Select Vertex Set Filter from the list.
ii. Select at least one vertex which you do not want to be included in your subgraph from the Vertex Browser on the right.
d. Click Add.
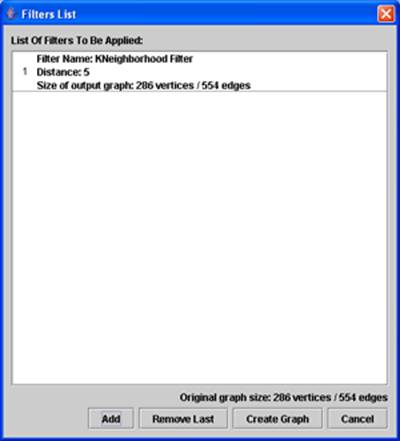
e. Repeat (a) – (d) for any number of filters.
f.
Click Create Graph to draw the final filtered graph.
Errors and Warnings:
a. If
the graph you are creating has more then 250 vertices, graph drawing will be
slow. You will be prompted to confirm the drawing of the graph.
2) Calculate subgraph size
a. Do
Step (a) in Create a subgraph and then click Calculate size
Algorithms Menu
1) Run PageRank
a. Ensure
that the graph is displayed
b. Click
Algorithms à
PageRank
2) Run PageRank with Priors
a. Ensure
that the graph is displayed
b. Ensure
that at least one vertex is selected
c. Click
Algorithms à
PageRank w/Priors
Errors and Warnings:
a. No
vertex selected – Error message displayed
3) Run S-T Betweenness
a. Ensure
the graph is displayed
b. Ensure
that only two vertices are selected
c. Click
Algorithms à
S-T Betweenness
Errors and Warnings:
a. Not
exactly two vertices are selected – Error message displayed
Window Menu
1) Hide/Display the debug dialog window
a. Click
Window à
Show Debug Dialog
2) Hide/Display the vertex viewer dialog window
a. Click Window à Show Vertex Dialog
Netsight Toolbar
1) Load the previous graph in the graph history
a. Click the back arrow button in the toolbar
2) Load the next graph in the graph history
a. Click the forward arrow button in the toolbar
3) Freeze the graph layout mechanism
a. Click the Freeze button in the toolbar
Vertex Viewer
1) Select a vertex
a. Double-click
using the left mouse button on a vertex label in the top vertex list
OR
Double-click using the left mouse button on a vertex in the main window
2) Deselect a vertex
a. Double-click
using the left mouse button on a selected vertex in the top vertex list
OR
Double-click using the left mouse button on a selected vertex in the selected vertices list (the bottom list)
OR
Double-click using the left mouse button on a selected vertex in the main window
3) Find a vertex by label
a. Enter
the part of or the entire vertex label you want to search for in the Find
Vertex text field
b. Click
on Find or hit Enter
Errors and Warnings:
a. Vertex
not found – Not found message displayed
4) Clear selected vertices
a. Click
on the “Clear all selected vertices” button in the vertex viewer